

Blog
Dutch Oven Pot Roast: Classic Sunday Dinner

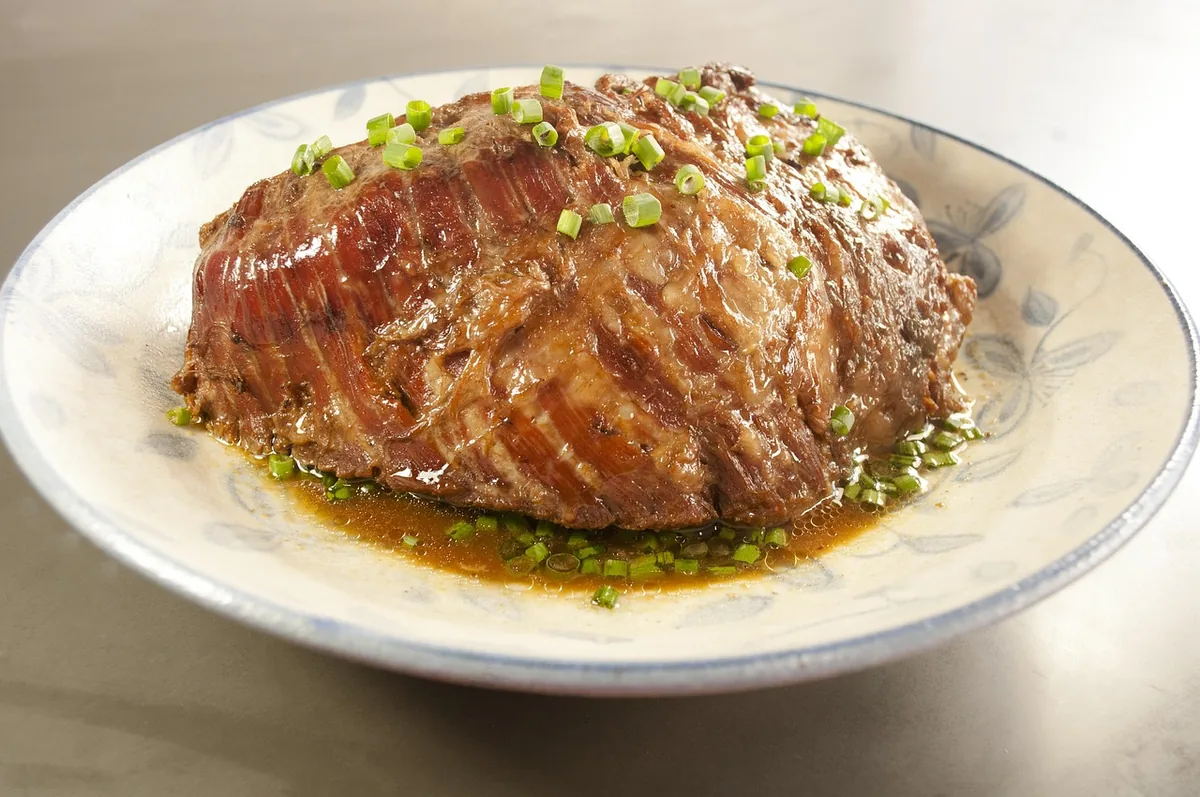
A Dutch oven pot roast is the classic Yankee Sunday dinner: one big, inexpensive beef roast, browned hard in a heavy pot, then braised low in beef broth with tomato paste, Worcestershire, thyme and bay until it falls apart under a fork. Carrots and potatoes go in later, in stages, and the liquid left in the pot becomes a rich pan gravy.
Below you’ll find which roasts work best (with a time table), what size pot to use, an oven method and a stovetop-only method, the gravy, and why a Dutch oven pot roast made the day before slices more neatly. The printable recipe card is at the bottom.
Why You’ll Love This Dutch Oven Pot Roast
A Dutch oven’s thick walls and heavy lid hold steady, gentle heat on every side. The meat sears well, the liquid barely reduces, and nothing scorches during a long braise.
- No wine needed. The flavor comes from a deep sear, tomato paste, Worcestershire and herbs, so it suits kids and anyone who skips alcohol.
- Works with several cuts. Chuck is the classic, but bottom round, brisket flat and short-rib roasts all braise well (see the table below).
- Oven or stovetop. No oven space on a holiday? A Dutch oven pot roast can simmer on a back burner instead.
- Vegetables that hold their shape. Adding them in stages means firm carrots and creamy potatoes, not mush.
- Better the next day. It reheats beautifully and slices cleanly once chilled.
Best Cuts for a Dutch Oven Pot Roast
Any braised beef roast needs connective tissue that melts into gelatin over a few hours. Lean, tender roasts such as tenderloin or eye of round never get there; they just dry out. These four cuts are the ones to look for. Times are for a 3- to 4-lb (1.4 to 1.8 kg) roast, covered, at 300°F (150°C).
| Cut | Oven time at 300°F | Stovetop time | Result |
|---|---|---|---|
| Chuck roast (shoulder, also sold as arm, blade or 7-bone roast) | 3½ to 4 hours | 3 to 3½ hours | The most forgiving; juicy and shreddable |
| Bottom round or rump roast | 3 to 3½ hours | 2½ to 3 hours | Leaner; slices neatly, best cut thin with plenty of gravy |
| Brisket flat | 3½ to 4½ hours | 3½ to 4 hours | Long, even slices with a beefy, rich bite |
| Bone-in short-rib roast (English-cut slab) | 3 to 3½ hours | 3 to 3½ hours | The richest; meat slips off the bones, skim the fat well |
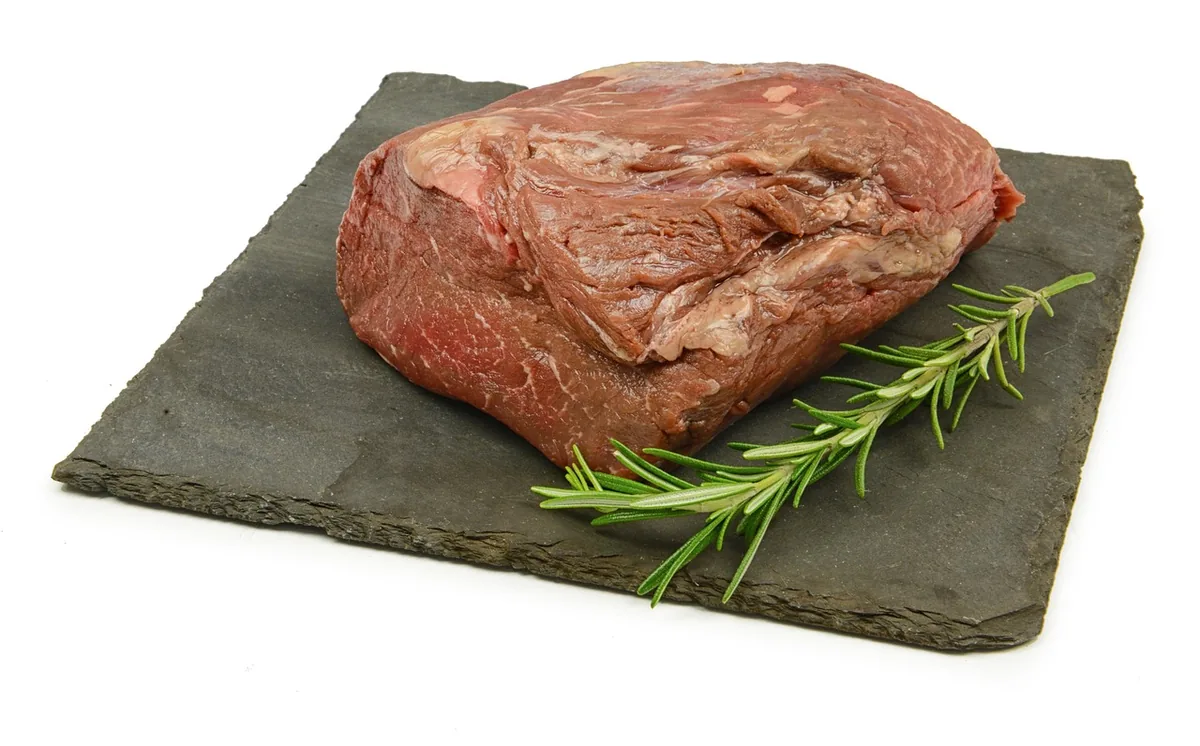
For your first Dutch oven pot roast, pick a chuck roast 2½ to 3 inches thick with plenty of white marbling. It tolerates an extra half hour without drying out. Choose bottom round for tidy slices, and brisket for long slices that make great sandwiches.
Ingredients for Dutch Oven Pot Roast
This is a classic Yankee pot roast: no wine, just beef broth and pantry seasonings. These amounts serve 6 to 8.
For the roast
- Boneless beef chuck roast, 3 to 4 lb (1.4 to 1.8 kg), or one of the cuts in the table above.
- Diamond Crystal kosher salt, 2½ teaspoons (or 1¼ teaspoons table salt), and black pepper, 1 teaspoon.
- Neutral oil, 2 tablespoons, such as canola or avocado.
For the braising liquid
- Yellow onions, 2 medium, cut into thick wedges.
- Celery, 2 ribs, cut into 2-inch (5 cm) pieces.
- Garlic, 6 cloves, smashed.
- Tomato paste, 2 tablespoons.
- Low-sodium beef broth, 3 cups (720 ml).
- Worcestershire sauce, 2 tablespoons.
- Fresh thyme, 5 sprigs (or 1 teaspoon dried), and 2 bay leaves.
For the vegetables and gravy
- Carrots, 1 lb (450 g), peeled and cut into 2-inch (5 cm) chunks.
- Yukon Gold potatoes, 2 lb (900 g), cut into 1½-inch (4 cm) chunks.
- Unsalted butter, 3 tablespoons, softened, and all-purpose flour, 3 tablespoons (23 g), for the gravy.
- Fresh parsley, chopped, to serve.
Want a ready-made rub? Use 2 tablespoons of our pot roast seasoning in place of the salt and pepper. It already has garlic, onion and herbs, so you can skip the dried thyme.
Equipment You Need
Pot size matters more than the brand. Too big, and the liquid spreads thin; too small, and the vegetables won’t fit. The roast should fill the base with about an inch to spare.
| Roast weight | Dutch oven size | Notes |
|---|---|---|
| 2 to 3 lb (0.9 to 1.4 kg) | 5 to 5½ quart | Room for about 2 lb of vegetables |
| 3 to 4 lb (1.4 to 1.8 kg) | 6 to 7 quart | The standard size for this recipe |
| 4 to 5 lb (1.8 to 2.3 kg) | 7 to 8 quart | Add vegetables in two layers |
| 5 to 6 lb (2.3 to 2.7 kg) or brisket | 8 to 9 quart, or an oval Dutch oven | Oval pots fit long roasts and brisket best |
- A heavy lid. If it’s loose, lay a sheet of foil over the pot before closing it.
- Tongs for searing and turning.
- A wooden spoon to scrape up the browned bits.
- An instant-read thermometer (optional) and a fat separator or ladle for skimming.
Enameled and bare cast iron both make a great Dutch oven pot roast; enamel is simply easier to clean.
How to Make Dutch Oven Pot Roast (Step by Step)
This is the whole pot roast recipe Dutch oven cooks have relied on for generations: about 25 minutes of hands-on work and 3½ to 4 hours of braising. A 300°F (150°C) oven keeps the liquid at a lazy bubble; the stovetop version follows.
- Season ahead if you can. Pat the roast very dry and season all over with the salt and pepper. For the best flavor, do this the night before and leave it uncovered on a rack in the fridge.
- Heat the oven. Set a rack in the lower third and heat the oven to 300°F (150°C).
- Sear hard. Heat the oil in the Dutch oven over medium-high heat until it shimmers. Brown the roast 4 to 5 minutes per side without moving it, then brown the edges, about 12 to 15 minutes in all. Move it to a plate.
- Cook the aromatics. Lower the heat to medium. Add the onions and celery with a pinch of salt and cook 4 to 5 minutes. Stir in the garlic and tomato paste and cook 1 to 2 minutes, until the paste turns brick red.
- Deglaze. Pour in 1 cup of the broth and scrape the bottom clean. Add the remaining broth, the Worcestershire, thyme and bay leaves.
- Braise. Return the roast and its juices. The liquid should come about halfway up the meat. Bring to a simmer, cover and move to the oven for 2 hours, turning the roast once after 1 hour.
- Add carrots (stage 1). Tuck the carrots into the liquid around the roast. Cover and braise 30 minutes more.
- Add potatoes (stage 2). Add the potatoes, pressing them into the liquid, and season them with a pinch of salt. Cover and braise another 60 to 75 minutes, until a fork twists easily in the meat and the vegetables are tender.
- Rest. Move the roast and vegetables to a platter, tent with foil and rest 15 to 20 minutes while you make the gravy.
Why the vegetables go in stages
Each vegetable needs a different time in the braise, so adding them together means some turn to mush while others stay hard.
- Start: onions, celery and garlic. They melt into the liquid and flavor the gravy.
- About 90 to 105 minutes before the end: carrots and parsnips, cut into 2-inch pieces.
- About 60 to 75 minutes before the end: potatoes in 1½-inch chunks, turnips or rutabaga.
- Last 10 minutes: frozen peas or green beans, if you like.
Stovetop-Only Dutch Oven Pot Roast (No Oven)
A braised beef roast doesn’t need an oven, which is handy when the oven is full of sides. Heat comes only from below, so you need the lowest possible flame and an occasional check.
- Sear, cook the aromatics and add the liquid exactly as in steps 3 to 5 above.
- Return the roast, bring to a simmer, cover, and turn the burner to its lowest setting. You want a bubble or two every few seconds, not a rolling boil.
- Simmer 1½ hours, turning the roast and stirring the bottom every 45 minutes. If the liquid drops below a third of the way up the meat, add ½ cup (120 ml) broth or water.
- Add the carrots and simmer 20 minutes, then add the potatoes and simmer 50 to 60 minutes more, until everything is fork-tender. The stovetop total is usually 3 to 3½ hours.
- Use a heat diffuser (flame tamer) on gas burners that won’t go low enough.
- Turn the roast more often than in the oven, because the top half sits above the liquid.
How to Make Pan Gravy
The braising liquid is already seasoned and full of gelatin, so the gravy takes 5 minutes. A beurre manié (butter and flour mashed together) thickens it without lumps.
- Skim. Remove the thyme stems and bay leaves. Tilt the pot and spoon off the fat, or pour the liquid into a fat separator. You should have about 2 to 2½ cups (480 to 600 ml).
- Reduce. Bring the liquid to a simmer over medium-high heat and let it bubble 3 to 4 minutes to concentrate.
- Thicken. Mash the softened butter and flour into a paste. Whisk it into the simmering liquid a teaspoon at a time, then simmer 2 minutes, until glossy and thick enough to coat a spoon.
- Season. Taste and add salt, pepper or a dash more Worcestershire.
| Gravy problem | Fix |
|---|---|
| Too thin | Simmer 3 to 5 minutes more, or whisk in another tablespoon of butter-flour paste |
| Too thick | Whisk in broth 2 tablespoons at a time |
| Bland | Add salt first, then ½ teaspoon Worcestershire |
| Gluten-free needed | Use 1½ tablespoons cornstarch mixed with 2 tablespoons cold water instead of the paste |
If you love a thick brown gravy, the onion gravy in our beef tips and gravy uses the same browned-bits idea in a quicker stovetop dish.
Tips for the Best Dutch Oven Pot Roast
A Dutch oven pot roast is simple, but a few details separate a tender roast from a dry, stringy one.
- Dry the meat. A wet surface steams instead of browning, and the crust is where most of the flavor comes from.
- Don’t drown it. Liquid halfway up the roast braises it; covering it completely just boils it.
- Keep the heat low. At 350°F and above, the liquid boils hard and the outside dries out before the center turns tender.
- Push past the tough stage. Around the 2-hour mark the meat often feels firm and tight. That’s normal; keep going.
- Trust the fork. If a fork meets resistance, cover the pot and give it 30 more minutes.
- Use waxy or all-purpose potatoes. Yukon Gold and red potatoes hold their shape; russets break down.
- Slice across the grain for bottom round and brisket; chuck can be pulled into large chunks.
Temperature: safe vs tender
Whole cuts of beef are safe once they reach 145°F (63°C) with a 3-minute rest, according to the FoodSafety.gov safe minimum temperatures chart. A braised beef roast goes much further. Collagen only melts into gelatin between about 195°F and 205°F (90 to 96°C), so aim for roughly 200°F (93°C) in the thickest part.
| Internal temperature | What the meat is like |
|---|---|
| 145°F (63°C) | Safe, but chewy and full of connective tissue |
| 160 to 180°F (71 to 82°C) | Safe, but tight and dry; the toughest stage |
| About 200°F (93°C), held a while | Fork-tender and juicy; this is pot roast |
Easy Variations and Substitutions
The classic Yankee flavor is a starting point. These swaps keep the method the same.
- Red wine: replace 1 cup of the broth with dry red wine. For a fully wine-braised chuck roast in the oven, see our chuck roast in the oven.
- Mushroom: add 8 oz (225 g) quartered cremini mushrooms with the onions.
- More root vegetables: parsnips go in with the carrots; turnips, rutabaga and pearl onions with the potatoes.
- Slow cooker: sear first, then cook on LOW 8 to 10 hours. Our chuck roast crock pot recipe has the full method.
- Tangy and buttery: for the pepperoncini version, try Mississippi pot roast in the Instant Pot.
| Instead of | Use |
|---|---|
| Fresh thyme | 1 teaspoon dried thyme |
| Worcestershire | 1 tablespoon soy sauce plus 1 teaspoon red wine vinegar |
| Beef broth | Water plus 2 teaspoons beef bouillon paste (reduce the salt) |
Make-Ahead: Cook It the Day Before
A braised beef roast is one of the few dinners that is better on day two. The flavor settles, the fat rises and hardens so you can lift it off in one piece, and a cold roast slices into clean, even pieces instead of shredding.
| When | What to do |
|---|---|
| Day 1 | Braise the roast with the carrots but without the potatoes. Cool for up to an hour, then refrigerate the roast in its liquid in a covered container. |
| Day 2, 1½ hours before dinner | Lift off the solid fat. Slice the cold roast across the grain about ½ inch (1 cm) thick. |
| Day 2, 1 hour before | Bring the liquid to a simmer on the stove, add the potatoes, cover and cook 25 to 30 minutes until tender. |
| Day 2, 20 minutes before | Lay the slices in the liquid, cover and warm gently over low heat (or in a 325°F oven) until 165°F (74°C). Make the gravy. |
Cooking the potatoes fresh on day two keeps them from turning grainy, and on a holiday all that’s left is reheating and gravy.
What to Serve With Dutch Oven Pot Roast
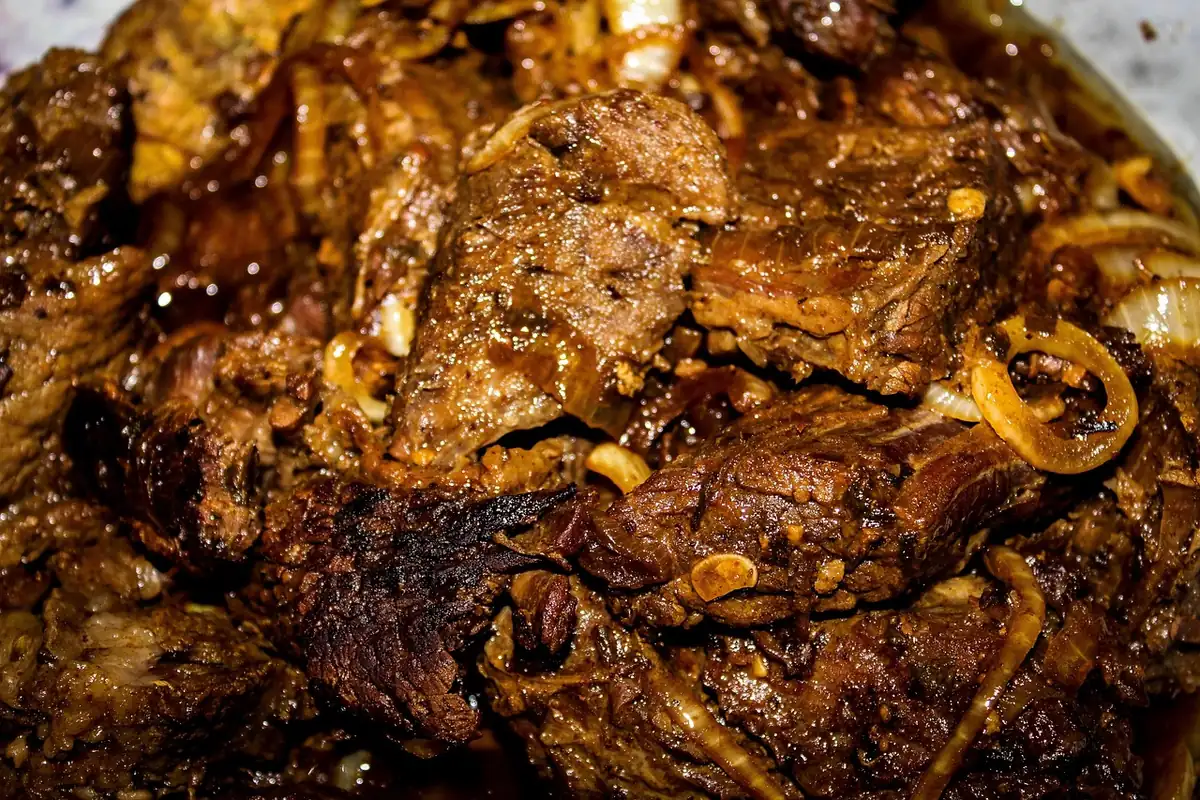
The potatoes and carrots make a Dutch oven pot roast a one-pot dinner, but a couple of sides round out a Sunday table.
- Mashed potatoes or egg noodles if you skip the potatoes in the pot, to catch every drop of gravy.
- Something green: buttered green beans, roasted Brussels sprouts or a crisp salad with a sharp vinaigrette.
- Bread: dinner rolls, biscuits or crusty bread.
- Horseradish cream: ½ cup sour cream mixed with 2 tablespoons prepared horseradish.
Leftover Dutch oven pot roast makes great hot sandwiches or hash with a fried egg. If you’d rather cook a beef dinner in chunks, our crockpot beef stew uses similar flavors. Want a lighter dinner later in the week? Try these oven roasted chicken thighs. More ideas are in our beef recipes.
How to Store, Freeze and Reheat
Refrigerate leftover Dutch oven pot roast within 2 hours of cooking, with the meat in its gravy so it stays moist.
- Refrigerate in shallow airtight containers for 3 to 4 days, per the FoodSafety.gov cold food storage chart.
- Freeze the meat and gravy (without potatoes, which turn grainy) for up to 3 months. Leave ½ inch of headspace.
- Thaw overnight in the refrigerator.
Reheating
- Stovetop: warm slices in gravy, covered, over medium-low heat with a splash of broth until they reach 165°F (74°C).
- Oven: cover with foil and heat at 325°F (165°C) for 20 to 30 minutes, to 165°F.
- Microwave: cover loosely and heat in 1-minute bursts, turning the pieces, until steaming hot and 165°F throughout.
- Thick, jelly-like gravy after chilling is a good sign of gelatin. It loosens as it warms; thin with broth if needed.
Dutch Oven Pot Roast FAQs
What temperature do you cook pot roast in a Dutch oven?
Use 300°F (150°C) for a slow, gentle braise, or 325°F (165°C) to finish about 30 minutes sooner. On the stovetop, use the lowest burner setting.
How long does a 3 lb pot roast take in a Dutch oven?
A 3 lb chuck roast takes about 3½ hours at 300°F, and a 4 lb roast about 4 hours. Thickness matters as much as weight, so always finish with the fork test.
Should the pot roast be covered in liquid?
No. The liquid should come about halfway up the roast. The top half cooks in steam under the lid, and turning the roast once keeps it moist.
Why is my pot roast still tough?
It almost always needs more time. Pot roast passes through a tight, chewy stage before the collagen melts. Cover it and cook 30 minutes longer, then test again.
Can I make pot roast in a Dutch oven without wine?
Yes. This classic Yankee Dutch oven pot roast uses only beef broth, tomato paste, Worcestershire, thyme and bay leaves for a deep, savory flavor.
Dutch Oven Pot Roast Recipe Card
Calories are an estimate per serving (⅛ of the recipe, including the potatoes, carrots and gravy) based on USDA FoodData Central values for raw beef chuck, vegetable oil, butter, all-purpose flour, onion, celery, carrots, potatoes, tomato paste and beef broth.

Dutch Oven Pot Roast
Ingredients
Equipment
Method
- Pat the roast dry and season all over with the salt and pepper (ideally the night before, uncovered in the fridge). Heat the oven to 300°F (150°C) with a rack in the lower third.
- Heat the oil in the Dutch oven over medium-high heat. Sear the roast 4 to 5 minutes per side, then brown the edges, 12 to 15 minutes in all. Move to a plate.
- Lower the heat to medium. Cook the onions and celery with a pinch of salt 4 to 5 minutes. Add the garlic and tomato paste and stir 1 to 2 minutes until brick red.
- Pour in 1 cup broth and scrape the bottom clean. Add the remaining broth, Worcestershire, thyme and bay leaves.
- Return the roast and its juices; the liquid should come halfway up. Bring to a simmer, cover and braise in the oven 2 hours, turning once after 1 hour.
- Tuck in the carrots, cover and braise 30 minutes more.
- Add the potatoes with a pinch of salt, pressing them into the liquid. Cover and braise 60 to 75 minutes, until the meat is fork-tender (about 200°F) and the vegetables are soft.
- Move the roast and vegetables to a platter, tent with foil and rest 15 to 20 minutes.
- Remove the herb stems and bay leaves and skim the fat. Simmer the liquid 3 to 4 minutes. Mash the butter and flour together, whisk it in a teaspoon at a time and simmer 2 minutes until glossy. Season to taste.
- Slice or pull the roast into large pieces and serve with the vegetables, gravy and parsley.


